
Installing a wall sign for your business might sound straightforward. Yet measuring up goes far beyond grabbing a tape and hammer. Even the difference of a few millimetres or the wrong fastener type can lead to a sign collapsing or looking askew. You might think the biggest challenge is simply picking the right design, but the real secret lies in the way you assess your wall space and every technical detail before you ever lift a drill.
Table of Contents
- Step 1: Assess Your Wall Space And Sign Requirements
- Step 2: Gather Necessary Installation Tools And Materials
- Step 3: Prepare The Wall Surface For Installation
- Step 4: Position The Sign Accurately On The Wall
- Step 5: Secure The Sign With Appropriate Fasteners
- Step 6: Verify Stability And Visual Alignment Of The Sign
Table of Contents
Quick Summary
| Key Point | Explanation | |||||||||||||||||||||||||||
|---|---|---|---|---|---|---|---|---|---|---|---|---|---|---|---|---|---|---|---|---|---|---|---|---|---|---|---|---|
| 1. Assess wall space carefully | Measure dimensions and consider obstructions to ensure effective sign placement. | |||||||||||||||||||||||||||
| 2. Gather essential installation tools | Use quality tools like a drill and laser level for precise sign mounting. | |||||||||||||||||||||||||||
| 3. Prepare the wall surface thoroughly | Clean and repair surface imperfections to support a professional installation. | |||||||||||||||||||||||||||
| 4. Position the sign accurately | Mark correct placement using alignment tools to enhance visibility and aesthetics. | |||||||||||||||||||||||||||
| 5. Verify stability and alignment post-installation | Test the sign’s stability and check alignment to ensure a professional appearance.
Step 1: Assess Your Wall Space and Sign Requirements Before installing wall signs for your business, conducting a comprehensive assessment of your wall space and signage requirements is crucial. This initial step determines the success and visual impact of your sign installation, ensuring it complements your business environment and communicates your brand effectively. Begin by carefully measuring the available wall area where you plan to mount your sign. Wall dimensions are more than just width and height — consider architectural features like window frames, door edges, electrical outlets, and existing decor elements that might interfere with sign placement. Use a laser measuring tool or traditional measuring tape to capture precise measurements, recording both horizontal and vertical dimensions. Pay special attention to potential obstructions and structural limitations that could impact sign positioning. Next, evaluate your specific signage needs by considering your business objectives. Are you aiming to enhance brand visibility, provide directional information, or create a welcoming entrance statement? Different business types require varied sign approaches. A retail shop might prioritize eye-catching exterior signage, while an office environment might need more subtle, professional interior signage. Learn more about tailoring your signage strategy to match your unique business requirements. Factors to consider during your wall sign assessment include:
Carefully documenting these details will provide a solid foundation for selecting the right sign type, size, and installation method. By thoroughly understanding your wall space and signage objectives, you set the stage for a successful and impactful sign installation that effectively represents your business brand. Businesses unsure about which sign format is most suitable for their wall and location can get expert guidance from signage companies London who carry out site surveys as a standard part of the quoting process. Step 2: Gather Necessary Installation Tools and Materials Preparing the right tools and materials is a critical phase in wall sign installation that can make the difference between a professional finish and a disappointing result. Professional sign installation requires precision, careful planning, and a well-curated toolkit that matches your specific wall type and sign specifications. Professional-grade equipment matters significantly in achieving a secure and visually appealing sign mount. Start by selecting a high-quality electric drill with variable speed settings, which provides versatility across different wall surfaces like plaster, concrete, or drywall. Complementing your drill, invest in a comprehensive drill bit set that includes masonry bits for harder surfaces and standard bits for softer materials. A sturdy ladder or stable step platform is essential for reaching higher mounting locations safely. Measurement and alignment tools form the backbone of accurate sign installation. A digital laser level offers superior precision compared to traditional bubble levels, ensuring your sign remains perfectly horizontal or vertical. Digital measuring tools like laser distance meters provide quick, exact measurements, reducing human error. Explore professional signage installation techniques to understand advanced mounting strategies. Essential tools for your sign installation toolkit include:
Before beginning installation, verify that all tools are in excellent working condition. Check drill batteries are fully charged, measuring tools are calibrated, and you have an appropriate selection of mounting hardware matching your sign’s weight and wall material. By meticulously preparing your toolkit, you set the stage for a smooth, professional sign installation process.
|
Step 3: Prepare the Wall Surface for Installation
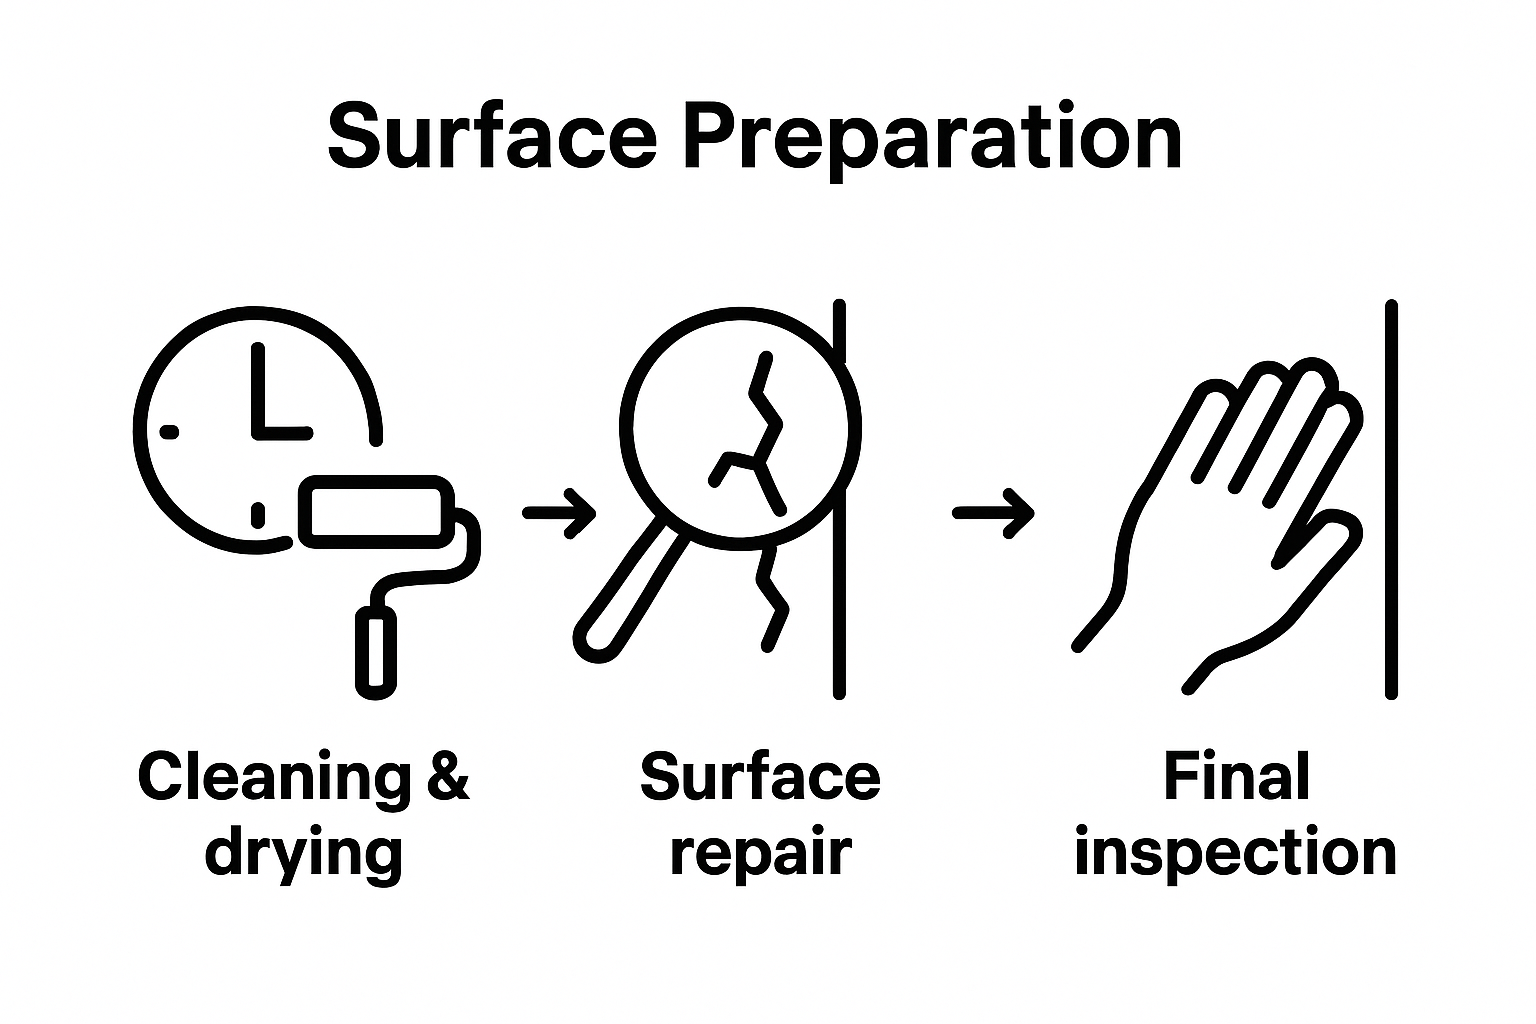
Preparing your wall surface is a critical step that directly impacts the longevity and appearance of your business signage. A meticulously prepared surface ensures secure mounting, prevents future damage, and creates a professional finish that reflects your brand’s attention to detail.
Surface preparation begins with a thorough cleaning process. Remove all dust, dirt, and potential contaminants using a combination of cleaning solutions appropriate to your wall material. For painted surfaces, use a mild detergent solution and a soft cloth, working carefully to avoid damaging the existing paint. When dealing with more robust surfaces like concrete or brick, a specialized cleaning solution might be necessary to remove embedded grime or mineral deposits. Check out our comprehensive guide on surface preparation for more detailed insights into specific wall types.
Inspect the wall surface critically for any imperfections that could compromise sign installation. Look for signs of damage such as hairline cracks, uneven surfaces, or areas of loose paint. Small holes or minor surface irregularities can be addressed using specialized wall repair compounds. For larger areas of damage, you might need to apply a surface leveling compound or consult a professional to ensure a smooth, stable mounting surface. Pay particular attention to areas where you plan to drill, ensuring the surface can support the sign’s weight and mounting hardware.
Key surface preparation considerations include:
- Removing all electrical outlet covers
- Cleaning the surface thoroughly
- Checking for surface integrity
- Repairing minor wall imperfections
- Ensuring a completely dry surface
- Protecting surrounding areas from potential damage
Once you’ve completed the preparation, perform a final inspection by running your hand gently across the surface to detect any remaining irregularities. The wall should feel smooth, clean, and solid. Allow sufficient drying time if any repair compounds have been applied, typically 24 hours, before proceeding with sign installation. A well-prepared surface not only ensures a secure mount but also contributes to the professional appearance of your business signage. For lightweight interior signs that avoid drilling altogether, foamex signs printing London boards can be mounted with heavy-duty adhesive strips on smooth interior surfaces, making them an ideal choice for temporary or frequently updated displays.
Step 4: Position the Sign Accurately on the Wall
Positioning your wall sign with precision is more than just an aesthetic choice — it is a strategic decision that impacts your business’s visibility, professionalism, and brand communication. The placement of your sign can significantly influence how customers perceive and interact with your business space.
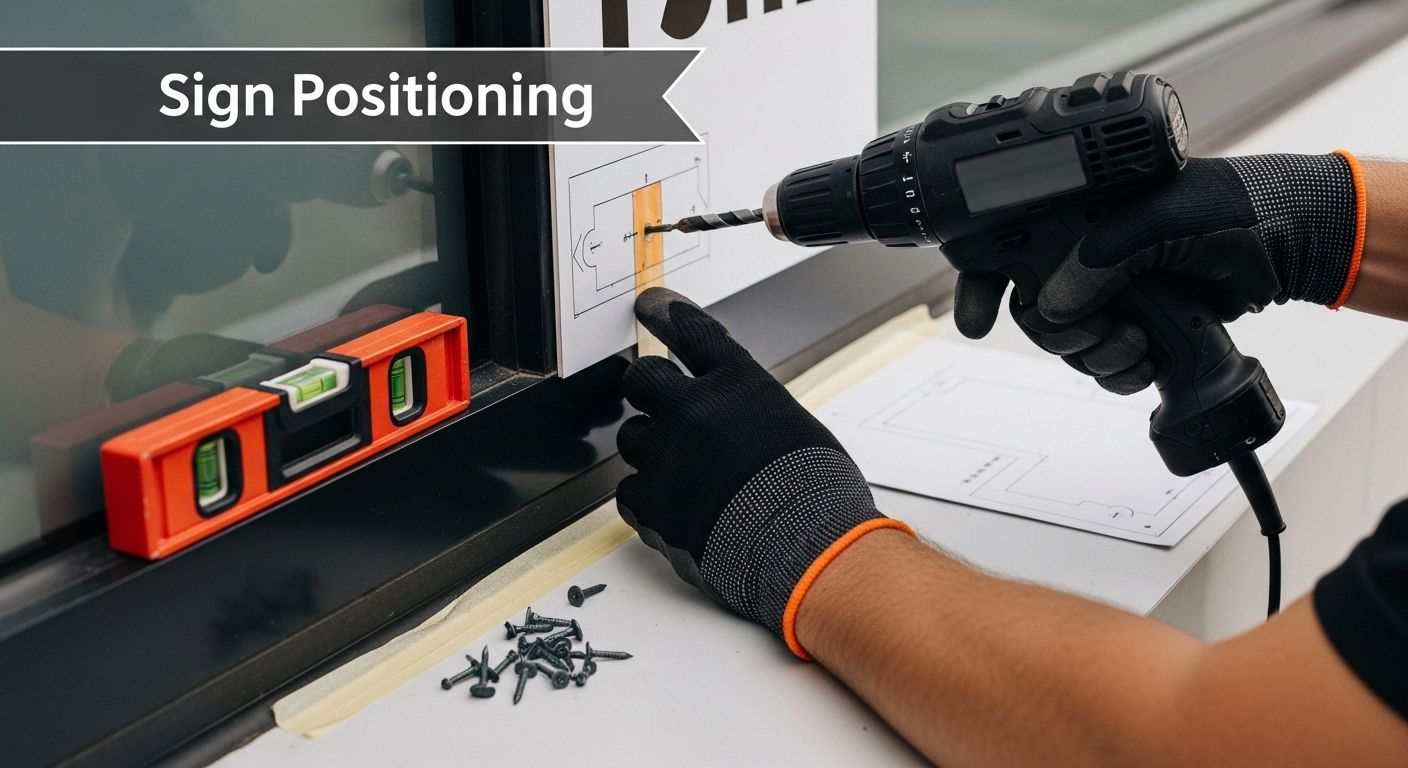
Marking the exact mounting location requires meticulous attention to detail. Begin by creating lightweight pencil marks using your digital laser level to ensure absolute horizontal and vertical alignment. These initial markings serve as crucial reference points for your sign’s placement. Take time to step back and visually assess the proposed location from multiple angles, considering factors like natural eye line, distance from ground level, and proximity to surrounding architectural elements. Discover professional sign placement techniques to maximise your sign’s visual impact.
The height and positioning of your sign should harmonise with your specific business environment. Commercial spaces require strategic sign placement that balances visibility with aesthetic integration. For storefront signs, typically mount at eye level or slightly above, which usually ranges between 1.5 to 2 metres from the ground. Interior office signs might require different positioning considerations, such as proximity to doorways or reception areas. Consider potential obstructions like windows, door frames, or lighting fixtures that could interfere with sign visibility or mounting.
Key positioning verification steps include:
- Confirming horizontal and vertical alignment using laser level
- Checking sign visibility from multiple approaching angles
- Measuring precise distance from ground level
- Verifying no obstruction of sign by architectural features
- Ensuring even spacing from surrounding elements
Before drilling any mounting holes, create a paper template of your sign and temporarily tape it to the wall. This allows you to visualise the final placement and make any necessary adjustments without permanent alterations. By taking these careful positioning steps, you ensure your wall sign not only looks professional but effectively communicates your brand message to potential customers. For businesses planning a complete exterior refresh alongside the wall sign, a coordinated approach that includes shop signs London for the fascia and entrance ensures every element works together visually.
Step 5: Secure the Sign with Appropriate Fasteners
Securing your wall sign requires precision, understanding of different wall materials, and selecting fasteners that guarantee long-term stability and safety. The right fastening technique prevents potential sign failure and ensures your business signage remains professionally presented under various environmental conditions.
Matching fasteners to your specific wall substrate is crucial. For plasterboard or drywall surfaces, toggle bolts or expanding wall anchors provide superior support, distributing the sign’s weight across a broader surface area. Concrete and brick walls demand more robust solutions like sleeve anchors or professional-grade masonry screws that penetrate deeply and create a secure mounting point. Learn advanced sign mounting techniques to understand complex installation scenarios.
Precision during the fastening process involves more than simply drilling and inserting screws. Align your mounting hardware carefully, ensuring each fastener enters the wall at a perfect 90-degree angle. This approach minimises potential wall damage and provides maximum structural integrity. Use a torque-controlled drill to prevent over-tightening, which could compromise the wall surface or damage the sign’s mounting points. For heavier signs, consider using multiple fastening points to distribute weight evenly and reduce stress on individual mounting locations.
Critical fastener selection considerations include:
- Matching fastener type to wall material
- Considering sign weight and dimensions
- Checking fastener corrosion resistance
- Verifying load-bearing capacity
- Ensuring proper depth and angle of insertion
- Selecting appropriate screw length
After installation, perform a comprehensive stability test by gently applying pressure to the sign from different angles. The sign should feel completely secure without any wobbling or movement. Check that all fasteners are flush with the mounting surface and that no gaps exist between the sign and the wall. By meticulously executing these fastening steps, you create a professional, reliable wall sign installation that reflects your business’s commitment to quality and attention to detail. If the sign being mounted is a bespoke piece engineered specifically for the wall space, working with a custom signs London supplier ensures the mounting points, weight distribution, and fixing hardware are all designed and tested before delivery.
Step 6: Verify Stability and Visual Alignment of the Sign
The final stage of wall sign installation involves a comprehensive verification process that ensures your sign not only looks professional but remains securely mounted and visually appealing from multiple perspectives. This critical step transforms your careful preparation and installation into a polished, reliable business communication tool.
Stability testing requires a systematic and thorough approach. Begin by applying gentle pressure to the sign from multiple angles, checking for any subtle movement or potential looseness. Use your hands to carefully push and pull the sign, assessing its resistance and structural integrity. A professionally installed sign should feel completely rigid, with zero wobbling or shifting. Explore professional sign installation validation techniques to understand advanced verification methods. Pay particular attention to edge points and mounting locations, as these areas often reveal potential installation weaknesses.
Visual alignment demands precision and a critical eye. Step back multiple times and view the sign from different distances and angles — the entrance, walkway, and potential customer approach points. Use your digital laser level to double-check horizontal and vertical alignment, comparing your current positioning against the initial measurement marks. Consider natural lighting conditions and how shadows might interact with the sign throughout different times of day. Assess whether the sign’s placement complements your business’s architectural style and surrounding environment, ensuring it communicates your brand message effectively.
Key verification steps include:
- Testing sign stability with controlled pressure
- Checking horizontal and vertical alignment
- Verifying mounting hardware tightness
- Assessing sign visibility from multiple angles
- Confirming no wall surface damage
- Evaluating aesthetic integration with surroundings
Complete your verification by photographing the installed sign from various perspectives. These images serve as a visual record and help you critically evaluate the installation. For large-format wall graphics — such as printed panels, brand murals, or oversized information displays — partnering with specialists in large format printing London ensures the graphic arrives correctly sized, colour-accurate, and ready for seamless installation on the wall surface you have prepared. By meticulously performing these final checks, you ensure a professional, secure, and visually appealing wall sign that represents your business with precision and quality.
| Verification Step | Description | Check Method |
|---|---|---|
| Test stability of sign | Ensure sign is securely mounted without movement | Apply controlled pressure |
| Check alignment | Confirm horizontal and vertical positioning | Use digital laser level |
| Inspect mounting hardware | All screws and fasteners should be tight and flush | Visual and manual check |
| Assess visibility from multiple angles | Ensure sign is clearly visible from approach points | Step back and view angles |
| Confirm wall surface is undamaged | No cracks or marks from installation | Visual inspection |
| Evaluate aesthetic integration | Verify sign complements surroundings and brand image | Overall visual assessment |
| Take installation photographs | Create a visual record of the finished result | Photograph from viewpoints |
Ready for Flawless Wall Sign Installation? Let Our Experts Handle the Details
You have just learned how crucial alignment, stability, and choosing the right installation tools are for creating professional business signage. But even with careful preparation, many businesses struggle with achieving a perfect finish or worry about damaging their walls or sign in the process. Getting each step right takes time, experience, and the proper materials. Errors can result in costly replacements and missed opportunities to impress your clients from the outset.
Let our seasoned team at PromoSigns take care of your sign from design to installation. We specialise in producing and installing custom shop signs, illuminated signs, and large format solutions throughout London, Essex, and Kent. No matter your wall type or business goals, we provide a seamless service tailored to your needs — so you can focus on running your business, not battling with drills and levels. Contact us today for a professional installation that elevates your brand and brings your vision to life.
Frequently Asked Questions
What should I consider when assessing my wall space for sign installation?
When assessing your wall space, consider wall dimensions, potential obstructions like windows and doors, natural and artificial lighting, wall material, and local building regulations. These factors will help you determine the best sign type, size, and placement for your business.
What tools do I need for installing wall signs?
Essential tools for wall sign installation include an electric drill, a comprehensive drill bit set, a digital laser level, measuring tape, a stud finder, a mounting hardware kit, safety glasses, and a clean cloth for preparation. Having the right tools ensures precision and a professional finish.
How do I prepare the wall surface before installing a sign?
Prepare the wall surface by cleaning it thoroughly to remove any dust or contaminants. Inspect for damage or imperfections and repair any issues before installation. Ensure the wall is completely dry, and protect surrounding areas to prevent damage during the installation process.
How can I ensure my wall sign is securely mounted?
To ensure your sign is securely mounted, select appropriate fasteners based on your wall material and sign weight, align the mounting hardware at a perfect 90-degree angle, and use multiple fastening points if necessary. Test the sign’s stability after installation to confirm it feels secure without any wobbling.
Recommended
- How to Install Your Shop Front Sign Like a Pro
- A Step-by-Step Guide to Professional Commercial Sign Installation
- How to Choose the Right Commercial Sign for Your Business
- What Makes A Great Shop Sign
