
TL;DR:
- Print resolution determines the sharpness of a printed image by measuring pixel or dot density and is essential for quality prints. PPI measures digital image detail, while DPI relates to printer ink droplets; these are often confused but serve different functions. Matching resolution to viewing distance and source pixel count ensures professional results across various print types.
Print resolution is the measurement of how many pixels or dots make up a printed image per inch, and it determines whether your final print looks sharp or blurred. Understanding print resolution means knowing the difference between PPI (pixels per inch) and DPI (dots per inch), recognising the 300 PPI industry standard for high-quality handheld prints, and applying that knowledge before your artwork goes to press. Get it wrong and you waste budget on prints that disappoint. Get it right and every sign, banner, or brochure you produce looks exactly as intended.
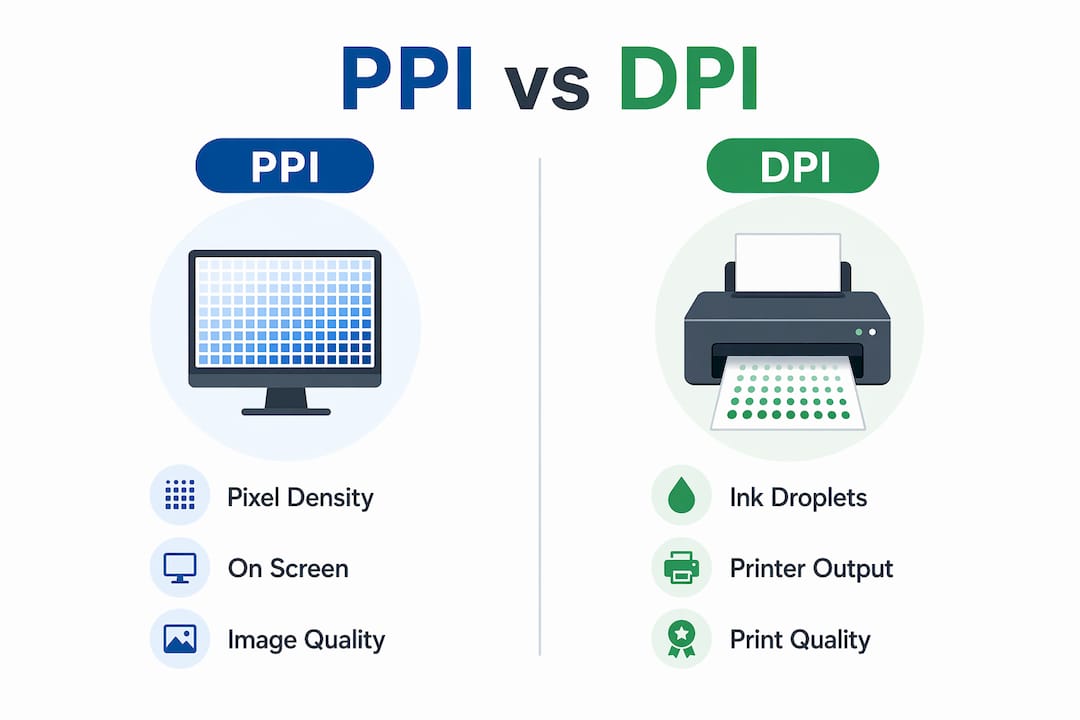
Table of Contents
What is the difference between PPI and DPI?
PPI and DPI are not the same thing, and confusing them is the most common mistake designers and businesses make when preparing print files. PPI refers to the pixel density of your digital image file. DPI refers to the number of ink droplets your printer lays down per inch of substrate.
Your image file has a fixed number of pixels. That pixel count determines how much detail the file actually contains. Commercial presses output at up to 2,400 DPI, but that high ink-droplet density only produces a sharp result if your image file supplies enough pixels to match.
Here is why the distinction matters in practice:
- PPI governs image detail. A file at 300 PPI contains enough pixel data for a sharp handheld print at its native size.
- DPI governs printer hardware. A printer at 1,200 DPI lays down finer ink droplets, producing smoother gradients and colour transitions.
- Mismatching the two causes problems. A low-PPI image sent to a high-DPI printer will still print blurred because the printer has no extra detail to work with.
- Standard requirement. High-quality photo prints, business cards, and brochures require 300 PPI for consistent sharpness at normal reading distance.
Pro Tip: Changing the DPI tag in your image metadata does not add pixels to your file. A file labelled “300 DPI” in its metadata but containing too few pixels will still print poorly. The pixel count is what matters, not the label.
What resolution do you need for different print types?
The right resolution depends on how large the print is and how close viewers will stand to it. 300 PPI is the standard for prints viewed at 12–18 inches, such as business cards, brochures, and framed photos. Large-format prints like banners and billboards are viewed from much farther away, so 100–150 PPI is entirely acceptable without any visible quality loss.

The human eye has a fixed resolving ability at a given distance. At arm’s length, it can distinguish fine detail. At ten metres, it cannot. Large-format prints leverage this limitation, which is why a billboard viewed from the street can be produced at lower PPI without anyone noticing.
The formula for calculating minimum pixel dimensions is straightforward: multiply the print width in inches by your target PPI. A 20-inch wide print at 300 PPI requires 6,000 pixels wide. That calculation tells you exactly what your source file must contain before you send it to print.
| Print type | Typical viewing distance | Recommended PPI |
|---|---|---|
| Business card | 12–18 inches | 300 PPI |
| A4 brochure | 12–18 inches | 300 PPI |
| Exhibition display | 1–2 metres | 150–200 PPI |
| Outdoor banner | 3–5 metres | 100–150 PPI |
| Hoarding or billboard | 10+ metres | 72–100 PPI |
Key points to apply from this table:
- Resolution is a sliding scale, not a single fixed rule.
- Printing at 300 PPI for a billboard wastes file size with no visible benefit.
- Printing at 72 PPI for a business card produces a noticeably blurred result.
- Always match your PPI target to the intended viewing distance before preparing artwork.
Pro Tip: When preparing artwork for large format signage, always confirm the intended installation location and typical viewer distance with your printer before finalising your file. That single conversation can save you from over-engineering a file or under-delivering on quality.
Why increasing DPI in software does not fix a low-resolution image
Raising the DPI number in software like Adobe Photoshop without resampling does not improve image quality. It only changes the suggested print size recorded in the file’s metadata. Altering DPI metadata is a suggestion to the printer software, not an instruction that creates new pixel data.
Resampling does add pixels, but it does so by interpolating existing ones. The software guesses what the new pixels should look like based on surrounding colour values. The result is softer than a genuinely high-resolution source image. Resampling adds pixels but cannot produce genuinely higher quality without better source data.
Practical steps for preparing images correctly:
- Print smaller. If your pixel count is too low for the intended size, reduce the print dimensions until the effective resolution reaches 300 PPI.
- Source higher-resolution files. Shoot at a higher megapixel count, use vector artwork where possible, or licence a high-resolution stock image.
- Use AI upscaling with caution. AI upscaling tools can produce usable results for large-format prints viewed at distance, but they are not a substitute for a properly captured source file in close-viewing applications.
- Check effective resolution in your layout software. Effective resolution is the actual resolution of an image adjusted for its scaling within a layout. Placing a 300 PPI image and then scaling it up to 200% halves the effective resolution to 150 PPI.
Pro Tip: In Adobe InDesign and similar layout applications, you can display the effective resolution of every placed image. Make this check part of your standard prepress workflow. It catches scaling errors before they reach the press.
Excessively high resolution creates its own problems. 300 PPI matches human eye resolution at normal reading distance, so going significantly above it yields no visible improvement but produces larger files that slow down processing and increase transfer times. Balance is the goal.
What other factors affect print quality beyond resolution?
Resolution is the foundation of print quality, but it does not work alone. Several other factors determine whether a finished print looks professional or flat.
Colour mode. CMYK is the standard colour mode for print. RGB is designed for screens and uses a wider colour gamut than most printers can reproduce. Sending an RGB file to a commercial press causes the printer’s software to convert it automatically, and that conversion can shift colours noticeably. Always convert artwork to CMYK before submitting to your printer.
Printer DPI and ink droplet density. A printer’s DPI affects how smoothly it renders gradients and fine details. A printer at 600 DPI produces visibly coarser transitions than one at 2,400 DPI, even when both receive the same 300 PPI image file. For signage and display work, printer capability matters as much as file resolution.
Substrate and material. The surface you print on affects perceived sharpness. A gloss substrate reflects light evenly and makes colours appear vivid. A matte or textured substrate absorbs ink differently, which can soften fine detail. For outdoor signage, UV-resistant materials also affect how colour holds over time.
Additional factors that influence the final result:
- Ink type (solvent, UV, latex, dye-sublimation) affects colour saturation and durability.
- Lamination adds protection and can alter the visual finish of a print.
- Artwork set up with bleed and crop marks prevents white edges on trimmed prints.
Reviewing your printer’s artwork guidelines before you finalise any file addresses most of these variables in one step.
What working in large-format print has taught me about resolution
The most persistent mistake I see from designers and businesses alike is treating the 300 PPI rule as absolute. It is a sensible starting point for close-viewing prints, but applying it rigidly to every job creates unnecessary problems. I have seen clients submit enormous files for outdoor hoardings that could have been produced at a quarter of the file size with identical visual results. The file took longer to process, the transfer took longer, and the print looked identical to a correctly sized version.
The opposite error is just as common. A business submits a logo saved at 72 PPI for a window graphic, assumes the printer will “sort it out,” and is then surprised when the result looks soft. Printers can scale low-resolution images up automatically, but that process reduces clarity rather than improving it.
My practical advice is this: always work backwards from the viewing distance. Establish where the print will be seen from, calculate the minimum PPI that human vision requires at that distance, and build your file to that specification. For large-format signage, that number is almost always lower than designers expect. For close-viewing retail graphics and printed branding, 300 PPI remains the right target.
Print technology continues to improve, and AI upscaling is becoming a genuinely useful tool for recovering detail from imperfect source files. But no software replaces the discipline of understanding what your file actually contains before it goes to press. Check your effective resolution. Confirm your colour mode. Match your PPI to your viewing distance. Those three habits eliminate the vast majority of print quality problems before they happen.
— Promo
High-quality print results start with the right partner
Getting print resolution right is only half the equation. The other half is working with a printer who understands how resolution, substrate, and production method interact to produce the final result.
Promosigns produces bespoke signage and large-format prints for retail, hospitality, and corporate clients across London, Essex, and Kent. From custom shop signs to exhibition displays and outdoor hoardings, every job is produced to precise specifications with professional artwork guidance included. If you are unsure whether your files are print-ready, the Promosigns team will review your artwork and advise on resolution, colour mode, and sizing before production begins. Contact Promosigns to discuss your next print project.
FAQ
What is the standard resolution for print?
The industry standard for high-quality handheld prints is 300 PPI, which matches the resolving ability of the human eye at 12–18 inches. Large-format prints viewed from greater distances can use 100–150 PPI without visible quality loss.
What is the difference between DPI and PPI?
PPI measures the pixel density of your digital image file, while DPI measures the number of ink droplets a printer lays down per inch. Both affect print quality, but they are controlled separately and serve different functions.
Does increasing DPI in Photoshop improve print quality?
Increasing the DPI value in software without resampling only changes the metadata tag and does not add pixel data. True print quality improvement requires either more pixels in the source file or a smaller print size.
How do I calculate the pixel dimensions I need for a print?
Multiply the print width in inches by your target PPI. A 10-inch wide print at 300 PPI requires a minimum of 3,000 pixels wide in your source file.
Why does my print look blurred even though I set it to 300 DPI?
A 300 DPI metadata tag does not guarantee sharpness if the file does not contain enough pixels for the print size. Check the actual pixel dimensions of your file and compare them against the required pixel count for your intended print size and PPI target.
Recommended
- Large Format vs Small Format Printing: London 2025 Guide – PromoSigns.co.uk
- Large Format Printing Basics 2025: Essential Guide for London Businesses – PromoSigns.co.uk
- Large Format Printing Explained: Essential Guide for London Businesses 2025 – PromoSigns.co.uk
- Understanding Sustainable Print Solutions: A Comprehensive Guide – PromoSigns.co.uk
