
The most effective display board ideas for events combine one hero visual with a single clear message, then add one interactive element to hold attention once you’ve earned it. That’s the pattern behind almost every stand, wall or signage build that outperforms its neighbours at conferences, exhibitions and product launches. Beyond that, the right approach depends on your venue, budget and objective.
Here’s a shortlist to work from:
- Backlit hero panel — best for dark halls or evening events where you need to be seen from across the room.
- Modular fabric backwall — best for organisers who need one asset that works at a 3x3m stand and a 6x3m stand.
- Writable feedback wall — best when the goal is engagement and social sharing over pure branding.
- Sponsor rotation screen — best for multi-day conferences with several sponsor tiers to service fairly.
- Photo backdrop with branded frame — best when the event’s success depends on attendee-generated content.
Choose based on three factors: how big the space is, what you want attendees to do, and how far away most people will be standing when they first see it.
Table of Contents
1. Creative display board ideas grouped by objective
Every good display board earns its place by doing one job well. Trying to make a single panel attract attention, explain your offer, and collect feedback usually means it does none of those things properly. Split your ideas by objective first, then pick the format.
Attract attention:
- Large-format backlit hero panel. A single striking image or headline lit from behind reads clearly from 15 to 20 metres away, even in a busy hall. Best footprint: medium to large. Execution tip: keep text to under eight words.
- Oversized 3D or dimensional lettering. Raised letters catch light differently to flat print, which draws the eye even in peripheral vision. Best for entrances and hall junctions.
- Colour-blocked freestanding pillar. A tall, narrow format that works in tight aisles where a full backwall won’t fit. Best for 10×10 booths.
Inform:
- Timeline wall. A horizontal sequence of panels telling a company or product history in chronological order gives visitors a reason to walk the full length of a stand. Best footprint: large, gallery-style events. Materials note: printed foamboard panels on a linked modular frame keep the sequence flexible for future reuse.
- Fact-and-figure info board. Short, numbered statements with one supporting icon each. Best for B2B stands where credibility matters more than spectacle.
- Process or “how it works” board. A simple three or four-step visual explaining a service. Best kept to secondary panels, not the hero position.
Engage:
- Interactive mural or writable wall. Give attendees a marker and a prompt (“Finish this sentence…”) and dwell time increases noticeably, particularly when the reward is small and immediate, such as a sticker or a badge. Writable walls and gamified elements reliably lift social sharing when framed by a clear prompt.
- Vote-with-a-sticker activation. Two or three options, attendees place a coloured dot sticker on their favourite. Cheap, fast, and gives you usable data by the end of the day.
- Prize or reward wall. A visible progress tracker (stamps, stickers, tokens) that rewards attendees for completing a set of stand activities.
Photo and social:
- Branded photo backdrop. A fabric or PVC backdrop with a simple, uncluttered design and your logo positioned so it appears in every photo without dominating it. Best footprint: small to medium, works even in a corner.
- Selfie frame or cut-out board. Cheap, portable, and disproportionately effective for social reach given the low production cost.
Sponsor recognition and wayfinding:
- Sponsor wall or rotating logo panel. Static print for fixed-tier sponsors, or a screen for rotating multiple sponsors fairly across a multi-day event.
- Directional signage board. Positioned at hallway junctions and entry points, wayfinding signage measurably cuts down the number of staff-hours spent answering “where is…” questions.
For small booths, stick to two or three of these at most. For large halls or gallery-style layouts, you can run several in sequence, provided each one has a distinct job.
Pro Tip: If you only have budget for one board, choose the photo backdrop over the info board. Attendee photos generate free reach long after the event ends; a fact sheet doesn’t.
2. Design principles: hierarchy, messaging and legibility at distance
Display board design controls what people see first and how their eyes move next, and strong hero-panel sequencing consistently outperforms text-heavy layouts for visitor engagement. Get the hierarchy wrong and even a beautifully printed board goes unread.
Put your brand and a single headline offer on the hero panel. That’s it. Proof points, testimonials, product detail and secondary messaging belong on smaller panels or handouts, never competing for space with your main message.
- Headline text should be legible from roughly ten times its height. A headline meant to be read from six metres away needs letters at least 15cm tall.
- Body copy on secondary panels should never drop below what’s comfortably readable at arm’s length, typically 2.5cm capital height for anything meant to be read up close.
- High contrast between text and background matters more than colour choice itself; dark text on a pale background, or the reverse, reads faster than mid-tone combinations.
- Leave genuine whitespace around your headline. A crowded panel forces the eye to hunt for the message rather than receive it instantly.
A well-executed board has to work as a magnet, not a hope. Research into stand design confirms that people don’t stop for boring boards; clarity and structure are what get feet to change direction.
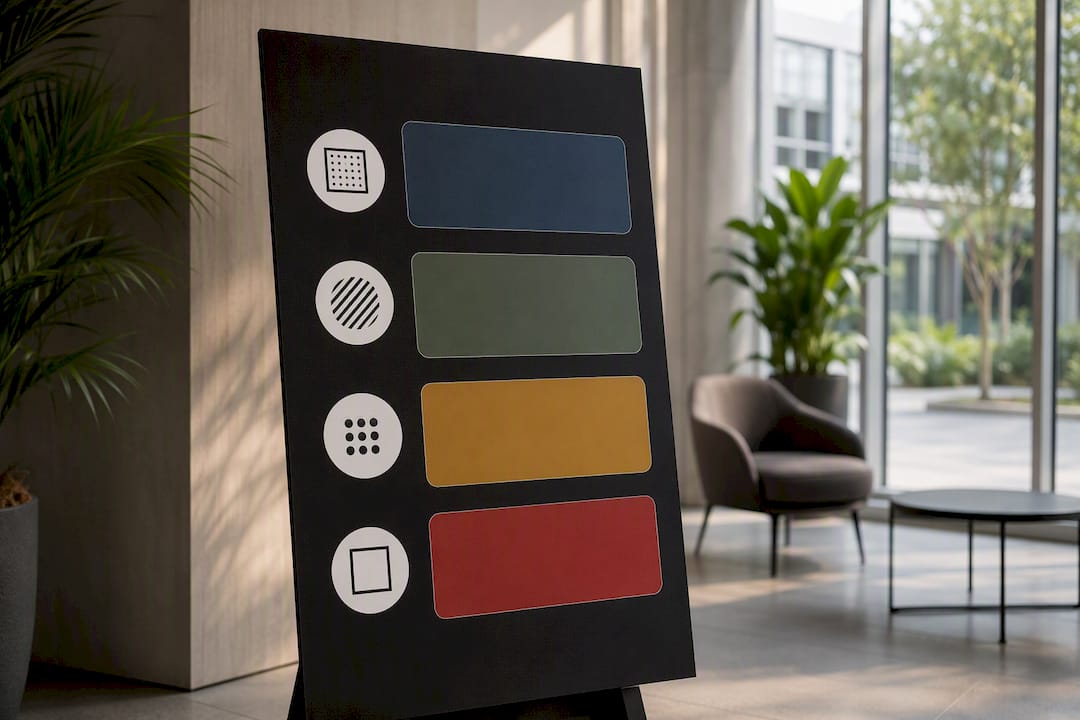
For accessibility, avoid red/green combinations as your only colour distinction, since a meaningful share of visitors have some form of colour vision deficiency. Pair colour cues with icons or labels, and choose typefaces with clear, simple letterforms rather than decorative scripts for anything carrying essential information.
3. Materials and formats: backdrops, panels, plinths and backlit options
Choosing the right build comes down to how often you’ll reuse it, how it needs to travel, and how much light it needs to fight against.
- Fabric backwalls are lightweight, crease-resistant when packed properly, and give a soft, premium print finish. Ideal for photo backdrops and large-format branding. Less rigid than panel systems, so they need a proper tensioned frame.
- Foamboard panels are affordable, lightweight and easy to cut into custom shapes, but they dent and scratch easily, making them better for single-use or short-run events than for touring stands.
- Sintra/PVC panels are more durable than foamboard and handle outdoor or high-traffic environments better, at a modest weight and cost increase.
- Modular linked panels connect into different configurations across different footprints, which makes them genuinely cost-effective over repeated events rather than a one-event expense.
- Backlit light boxes deliver serious visual impact and stay legible even in low ambient light, which makes them one of the higher-ROI upgrades for stands competing for attention in dim exhibition halls.
- Freestanding plinths raise objects or messaging to eye level; sealed MDF construction with Mylar film between object and surface prevents off-gassing damage to anything sensitive placed on top, and freshly finished plinths should be left to off-gas before use.
Any panel over roughly 1.8 metres tall needs a genuinely rated base or wall fixing, not just its own weight, particularly in venues with foot traffic or air conditioning draughts running close to floor level. Our fabric display stands are built with tensioning systems designed specifically for this kind of repeated venue use.
4. Interactive and tech-enhanced display board options
Not every event needs a screen. A writable marker wall, a sticker-vote board or a collaborative mural often outperforms digital signage for pure engagement, largely because the barrier to participation is lower: no app, no login, no queue.
Digital signage earns its place when you need to update content live, such as rotating a multi-day schedule or cycling through several sponsor tiers fairly. Screens work best mixing schedules, wayfinding and sponsor logos together rather than running a dedicated sponsor-only screen that visitors learn to ignore.
- QR-code gateways on static boards bridge print and digital cheaply, ideal for linking to a fuller case study or a booking page.
- Social media walls display a live hashtag feed, useful near a photo backdrop to encourage sharing.
- Plan for network reliability: venue Wi-Fi congestion is common, so screens showing live content need a resilient connection plan, such as a dedicated network segment or locally cached content, rather than relying purely on venue Wi-Fi.
- Sponsors on rotating screens will want proof-of-play reporting, so agree what’s being logged before the event, not after.
Pro Tip: Put wayfinding screens at junctions where people are deciding which way to go, and put sponsor-rotation screens where people are already queuing or waiting, not where they’re moving fast. A screen competing with foot traffic gets glanced at, not read.
5. Practical setup, logistics and hire checklist
Most display board failures on the day are logistics failures, not design failures. Work through this before you commit to a supplier or booking:
- Measure the actual space, not the space on the floor plan. Column positions, low ceilings and fire exits routinely shrink the usable footprint.
- Check sightlines from the main approach direction, not just head-on. A board facing the wrong aisle wastes its hero panel entirely.
- Confirm stability requirements with the venue. Many require freestanding structures over a certain height to carry ballast or a rated base.
- Plan lighting and glare. Glossy laminates under overhead spotlights can wash out text; matte finishes generally hold up better under mixed venue lighting.
- Map power and cabling if you’re running any screen, light box or charging point, and check the venue’s cable-management rules.
- Confirm transport and install lead times with your supplier, including whether staffed installation is included or an add-on.
- Build in a contingency, such as spare fixings, a backup print, or gaffer tape and cable ties on hand, since venue conditions rarely match the plan perfectly.
Hire generally works out cheaper for one-off events; buying pays off once you’re reusing the same board across three or more events a year. A structured hire checklist covering function, measurements, lighting and delivery timing catches most of the problems that otherwise surface on setup morning.
6. What working with a signage supplier actually looks like
Most organisers who come to us have a brief that’s roughly right but not quite matched to their venue: a backwall sized for the wrong stand dimensions, or a photo backdrop that clashes with a venue’s own branding restrictions. Our workflow runs design, then manufacture, then installation, with typical turnaround depending on complexity and print run size.
A few things come up repeatedly:
- Clients underestimate ceiling height restrictions until we ask for the venue’s technical pack.
- Modular panel requests increase noticeably around multi-venue roadshows, since one build needs to reconfigure across different footprints.
- Backlit requests spike for evening events and unlit exhibition halls, for obvious reasons.
If you’re weighing up display boards against branded merchandise for the same budget, a practical guide to designing standout branded apparel is worth a look before you split spend across formats.
7. How to build a simple, stable display board yourself
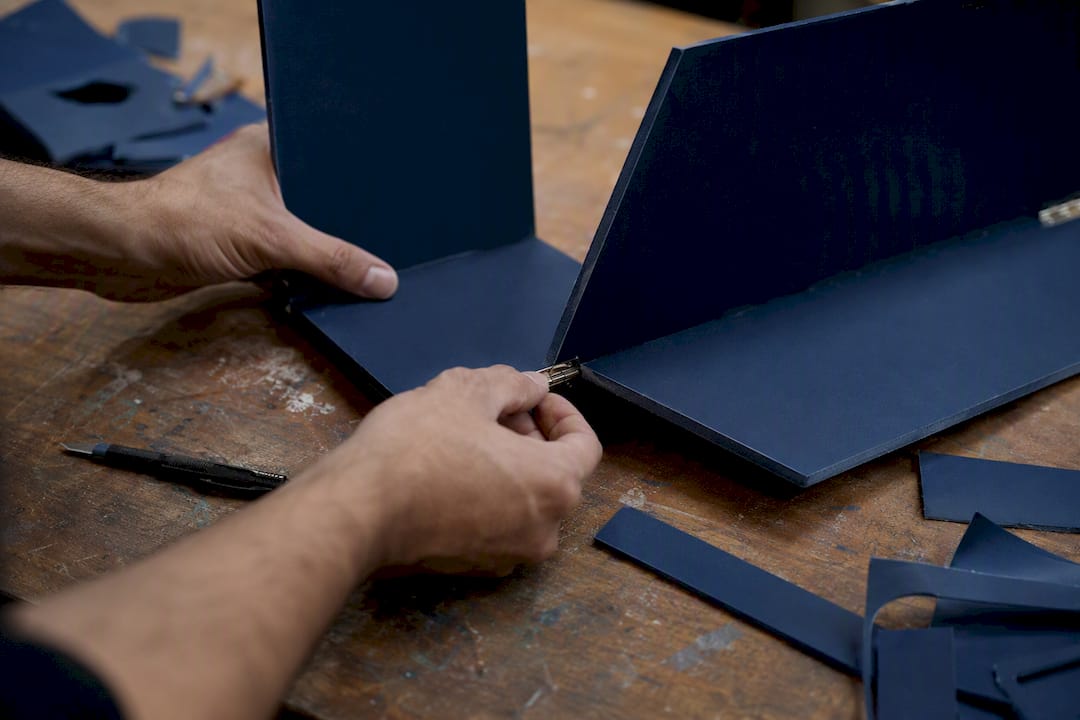
For a low-stakes event or an internal briefing, a DIY board is entirely workable if you respect a few basics.
You’ll need: a rigid board (foamboard or Sintra), a printed graphic sized to the board with a small bleed margin, a spray adhesive or mounting tape, a metal ruler and sharp blade, and a stable easel or freestanding frame.
- Plan the layout first, on paper or in software, confirming your hero message fits comfortably with margin to spare.
- Cut the board slightly oversized, then trim to final size after mounting the print, which avoids visible edges of adhesive.
- Apply the graphic from one edge, smoothing outward to avoid trapped air bubbles.
- Pack it flat, never rolled, for transport, since foamboard creases permanently once bent.
- Test the freestanding base indoors on a hard floor before the event, simulating the venue’s likely foot traffic.
Common pitfalls: text too small to read from across the room, glossy paper causing glare under venue lighting, and boards left unweighted near doorways.
Pro Tip: DIY foamboard is genuinely fine for internal meetings and community fairs. For anything customer-facing, high-traffic, or reused across multiple events, professional exhibition graphics hold up to handling and repeated transport far better than a home-cut panel ever will.
Sustainability, hybrid events and what to actually measure
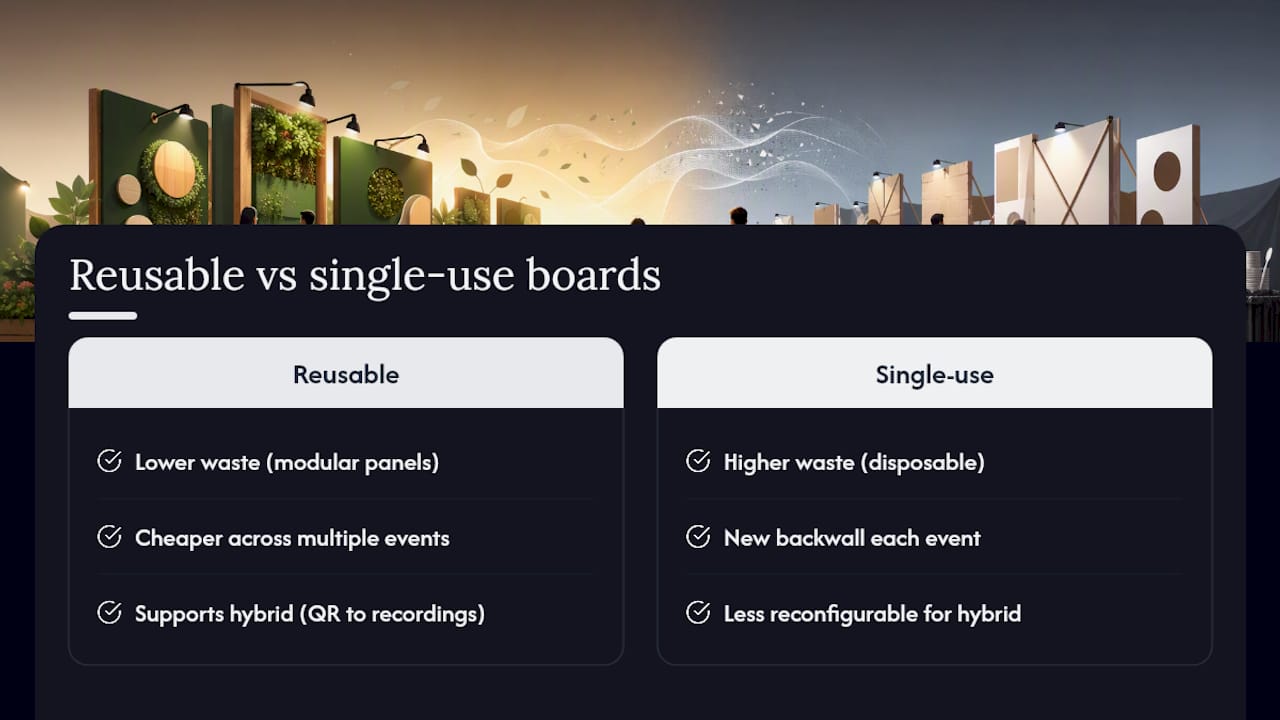
Modular, reusable panels are winning out over single-use boards, mainly because organisers are tired of paying for a new backwall every event when a reconfigurable one would do. Design boards that serve remote attendees too: a QR code linking a physical panel to session recordings or a digital resource costs nothing extra to add and closes the gap between in-room and virtual audiences.
On measurement, keep it realistic. QR scan counts, rough dwell-time observation, and social shares of your photo backdrop are the three metrics most organisers can actually track without a dedicated analytics team. Anything more granular usually isn’t worth chasing for a single event.
Bring your display board ideas to life with Promo
You’ve got the concepts. Turning them into something that survives a busy show floor, fits your exact stand dimensions, and looks sharp under venue lighting is where a specialist supplier earns its keep. Promosigns designs, prints and installs bespoke event displays, from large-format fabric backwalls and backlit panels to modular exhibition systems that reconfigure across different footprints and venues.
Every project runs through the same process: design proofing, large-format manufacture, and site-safe installation, so what arrives at the venue matches what you approved on screen. Turnaround depends on complexity and print volume, so it’s worth getting your brief in early if your event has a fixed date. If you’re planning a stand, launch or conference presence, get in touch through our exhibition graphics and stands page to request a quote and confirm lead times for your event.
Frequently asked questions
What’s the single most effective display board idea for events?
A large hero panel with one clear message, paired with one interactive element such as a writable wall or QR-code gateway. The hero panel earns attention; the interactive piece holds it.
How far in advance should I book display board design and installation?
Simple static panels can often turn around quickly, but backlit builds, modular systems and multi-venue roadshows need longer lead times for proofing and manufacture. Confirm your date with your supplier as soon as your venue is booked, not once the artwork is finished.
What size text is legible from across an exhibition hall?
As a working rule, headline letters should be roughly a tenth of the reading distance in height. For a message meant to be read from six metres, that means letters around 15cm tall or larger.
Should I hire or buy display boards for events?
Hire suits one-off events and tight budgets. Buying modular panels pays off once you’re running three or more events a year, since the same panels reconfigure across different stand sizes.
Are digital screens better than static boards for events?
Not automatically. Screens earn their place when content needs to change live, such as rotating schedules or sponsor logos. For static branding or photo backdrops, a well-printed static board is usually cheaper, more reliable, and just as effective.
Do I need professional installation for a large or backlit display board?
For anything freestanding above roughly 1.8 metres, or any board with lighting and cabling involved, professional installation is worth the cost. Venue stability requirements and electrical safety aren’t areas to guess on.
Sources
- Event signage for conferences, exhibitions and venues
- Exhibition display board design: creative trade show concepts
- Exhibition display techniques (practical guide)
Recommended
- Menu Display Boards – PromoSigns.co.uk
- 7 Essential Signage Trends for Events Every Organizer Needs – PromoSigns.co.uk
- Master Temporary Event Signage for Your Business Needs – PromoSigns.co.uk
- Master Temporary Signage for Events: A Practical Guide – PromoSigns.co.uk
