
Designing a door sign might sound straightforward. Yet, every choice you make, from word selection to where you hang the sign, can completely change how people feel or find their way.
Shockingly, signs placed just a few inches out of standard position can drop visibility by over 30 percent. The surprising bit is that many organisations still treat sign design as an afterthought, when in reality, a strategically crafted door sign can influence behaviour, boost accessibility, and even sharpen your brand presence.
Table of Contents
Table of Contents
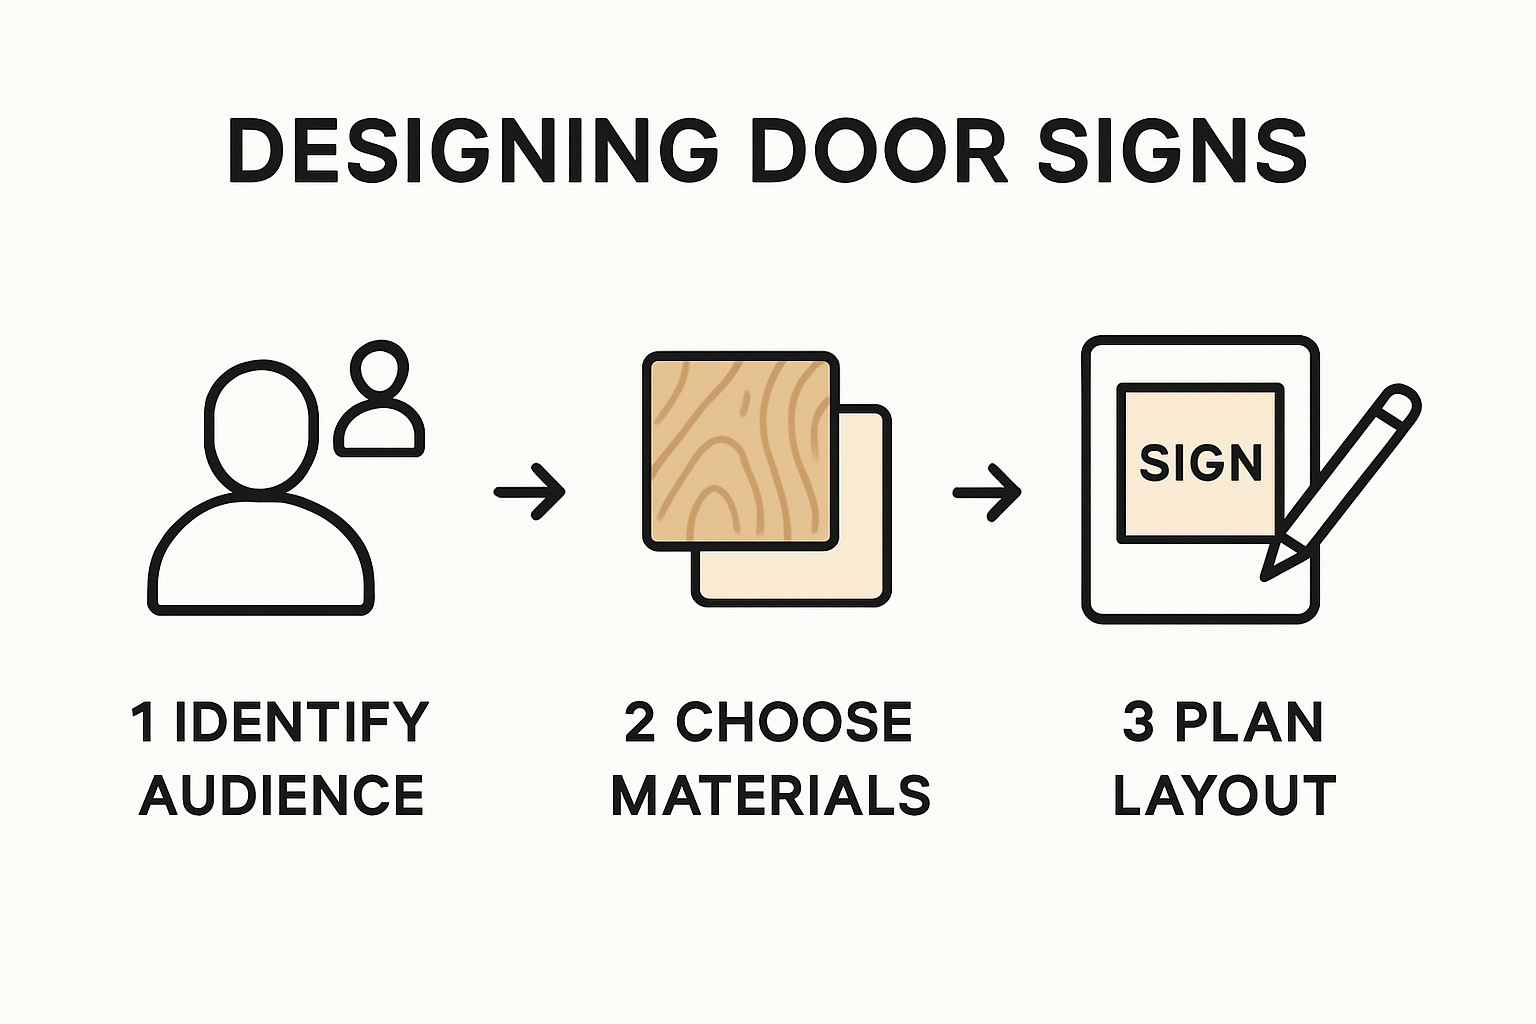
- Step 1: Identify Your Target Audience And Purpose
- Step 2: Choose Your Materials And Tools
- Step 3: Plan Your Design Layout And Content
- Step 4: Create The Design Using Software Or Handcrafting
- Step 5: Print Or Produce The Door Sign
- Step 6: Install The Sign And Verify Placement
Quick Summary
| Key Point | Explanation |
|---|---|
| 1. Identify your target audience clearly | Understanding who will view the sign shapes design and messaging for effective communication. |
| 2. Choose durable materials suitable for environments | Selecting materials based on indoor or outdoor settings is vital for longevity and visual quality. |
| 3. Plan design layout with visual hierarchy | Prioritize essential information and maintain clear readability for immediate viewer understanding. |
| 4. Use professional design tools or techniques | Whether digital or handcrafted, ensure your design process maintains consistency with the planned layout. |
| 5. Ensure proper installation for visibility | Correct placement and secure mounting are crucial for making the sign functional and accessible. |
Step 1: Identify Your Target Audience and Purpose
Designing effective door signs begins with a critical foundational step: understanding precisely who will view your sign and why. This initial phase determines the entire strategic approach to your signage design, ensuring your visual communication achieves its intended purpose.
When approaching door sign design, you must first conduct a thorough audience analysis. Consider the specific individuals who will interact with your sign. Are you creating signage for a corporate office, where professional stakeholders and visitors will read the information? Or designing for a medical facility where patients, healthcare professionals, and guests require clear, compassionate directional guidance? Each audience demands a unique visual and textual approach.
The purpose of your door sign fundamentally shapes its design strategy. A wayfinding sign in a complex hospital requires different design principles compared to an inspirational motivational sign in a creative workspace. Clarity of purpose is paramount. Are you aiming to provide directional information, establish branding, communicate room function, or create an emotional response? Understanding this core objective will influence every subsequent design decision.
Practical considerations should include examining the physical environment where the sign will be placed. Factors like lighting conditions, wall colour, surrounding architectural elements, and typical viewer distance all impact design effectiveness. A sign positioned in a dimly lit corridor needs higher contrast and potentially illuminated elements compared to one in a bright, well-lit reception area.
To verify you’ve successfully completed this foundational step, ask yourself these key questions:
- Have I precisely defined who will interact with this sign?
- Do I understand the primary purpose of the signage?
- Have I considered the environmental context where the sign will be displayed?
By meticulously addressing these considerations, you transform a simple door sign into a strategic communication tool that effectively connects with its intended audience.
According to University of Florida’s design guide, identifying your target audience is crucial for tailoring messages that truly resonate and communicate effectively.
Step 2: Choose Your Materials and Tools
Selecting the right materials and tools represents a pivotal moment in creating exceptional door signs. This step transforms your conceptual design into a tangible, professional communication tool that communicates effectively and withstands environmental challenges.
Begin by considering the physical environment where your sign will be displayed. Material durability matters significantly. Indoor signs require different materials compared to exterior signage exposed to weather fluctuations. For interior corporate environments, acrylic or aluminium provide sleek, professional finishes that resist wear and maintain a polished appearance. Exterior signs demand more robust materials like weatherproof PVC, metal composites, or specialised outdoor-grade acrylics that can withstand temperature variations, UV exposure, and moisture.
Your toolkit should include precision measuring equipment, design software, cutting tools, and mounting hardware. Professional design software like Adobe Illustrator or CorelDRAW enables precise vector graphics creation. For physical production, invest in high-quality cutting tools such as rotary cutters, precision knives, and measuring tapes to ensure accurate dimensions. Mounting hardware like standoffs, adhesive mounting systems, or integrated hanging mechanisms will depend on your specific sign type and installation surface.
Consider additional factors that might influence material selection. Accessibility requirements might necessitate tactile or braille elements, which requires specialized material treatments. Sound-sensitive environments might benefit from materials with acoustic dampening properties. Colour durability and light reflection become critical considerations, especially in spaces with variable lighting conditions.
To verify you’ve successfully completed this step, assess your selected materials against these verification criteria:
- Does the material match the environmental conditions?
- Will the sign maintain its visual quality over time?
- Have you selected appropriate mounting hardware?
- Does the material support your design aesthetic?
By methodically evaluating materials and tools, you transform a simple signage project into a professional communication strategy.
According to University of Technology Sydney’s design research, successful signage design involves careful prototyping and testing of materials to ensure they meet user needs effectively.
To help you select the appropriate materials and tools for your door sign project, the table below summarises key options, their suitability, and primary purposes as discussed in the article.
| Material/Tool | Common Use | Suitability/Notes |
|---|---|---|
| Acrylic | Indoor/Outdoor sign faces | Sleek, professional look; suitable for interior and weatherproof options |
| Aluminium | Indoor sign faces | Polished appearance; resists wear |
| Weatherproof PVC | Outdoor signage | Withstands weather changes, moisture, and UV exposure |
| Metal Composites | Outdoor signage | Durable, for high-traffic or exposed locations |
| Professional Design Software (Adobe Illustrator, CorelDRAW) | Digital design and layout | Enables precise vector graphics creation |
| Precision Cutting Tools | Sign production | Ensures accurate dimensions (rotary cutters, knives, measuring tape) |
| Mounting Hardware | Installation | Depends on sign type and wall surface; includes standoffs, adhesives |
| Braille Equipment/Treatments | Accessibility | For tactile/braille requirements |
Step 3: Plan Your Design Layout and Content
Planning your door sign’s layout and content represents the creative heartbeat of your design journey. This crucial step transforms technical considerations into a visually compelling communication tool that captures attention and conveys information efficiently.
Visual hierarchy becomes your strategic blueprint. Start by establishing the most critical information that must be communicated immediately. For professional environments, this typically means prioritizing names, room numbers, or departmental identifications. Consider the viewer’s natural visual scanning patterns. Most individuals read from top left to bottom right, so position your most important content accordingly. Typography plays a pivotal role in this process. Select fonts that are readable from a distance, maintaining legibility without sacrificing aesthetic appeal. Sans serif fonts like Arial or Helvetica often provide clean, professional readability, particularly in corporate or institutional settings.
Content density requires careful consideration. Overcrowded signs create visual confusion, while minimalist designs risk inadequate communication. Aim for a balanced approach that provides necessary information without overwhelming the viewer. Use white space strategically to create visual breathing room, allowing each element to stand out. Colour selection goes beyond aesthetic preference. Different colours communicate different emotional and professional tones. Blues and greys suggest corporate professionalism, while warmer tones like soft oranges or greens can create a more welcoming atmosphere.
For those seeking additional insights into creating impactful indoor signage, explore our comprehensive design tips to refine your approach further.
To verify you’ve successfully completed this planning stage, evaluate your design against these critical criteria:
- Does the most important information stand out immediately?
- Is the text readable from the expected viewing distance?
- Have you maintained a clean, uncluttered layout?
- Does the design align with the environmental context?
By meticulously planning your layout and content, you transform a simple sign into a strategic communication instrument that speaks volumes without saying too much.
According to National Park Service design standards, effective signage requires careful consideration of information hierarchy, typeface selection, and logical element arrangement to ensure optimal comprehension.
Step 4: Create the Design Using Software or Handcrafting
Transitioning from planning to actual design creation represents a critical moment where your door sign vision begins to take tangible shape. Whether you choose digital software or traditional handcrafting techniques, this step demands precision, creativity, and technical skill.
Digital design software offers remarkable flexibility and professional refinement. Professional vector graphics programs like Adobe Illustrator or CorelDRAW provide unparalleled control over design elements**. Begin by creating a new document with precise dimensions matching your planned sign size. Translate your layout sketches into digital form, carefully positioning text, selecting typography, and experimenting with colour palettes. Professional software allows pixel-perfect alignment, precise scaling, and multiple design iterations without material waste.
For those preferring hands-on approaches, traditional handcrafting techniques offer unique artistic opportunities. Skilled designers might use professional drafting tools like precision cutting mats, metal rulers, professional-grade cutting knives, and high-quality tracing paper. Handcrafting allows nuanced texture and personal artistic interpretation that digital methods sometimes lack. Consider techniques like hand-lettering, stencil creation, or mixed media approaches that blend digital and physical design elements. Waterproof markers, professional drafting pencils, and archival-quality design papers become your primary tools.
Regardless of your chosen method, maintain consistency with your original design planning. Reference your initial layout sketches, ensuring digital or handcrafted versions remain true to your original vision. Pay meticulous attention to spacing, alignment, and visual hierarchy established during earlier planning stages.
To verify your design creation process, evaluate against these critical criteria:
- Does the final design match your original layout concept?
- Have you maintained readability and visual clarity?
- Are all critical information elements present?
- Does the design look professional from multiple viewing distances?
By approaching design creation with methodical creativity, you transform conceptual plans into a professional, impactful door sign.
According to National Park Service design guidelines, effective sign design requires maintaining consistency, legibility, and thoughtful visual communication throughout the creation process.
Step 5: Print or Produce the Door Sign
Producing your meticulously designed door sign transforms digital concepts into tangible communication tools. This critical stage demands precision, technical understanding, and careful material selection to ensure professional results that match your original vision.
Professional printing requires strategic decision-making. Digital printing offers remarkable colour accuracy and crisp detail for most indoor signage requirements. High-resolution commercial printers with archival-quality inks ensure long-lasting visual integrity. For materials like acrylic or metal signs, consider specialised printing techniques such as direct UV printing or precision laser engraving. These methods provide exceptional durability and professional finish, particularly for corporate or institutional environments. Select printing services with demonstrated expertise in signage production, examining their portfolio and requesting material samples to confirm quality standards.
Material selection during production becomes paramount. Different printing techniques suit varying materials perfectly. Vinyl printing works exceptionally well for temporary signs, while metal etching or laser engraving provides permanent, professional solutions for high-traffic areas. Consider factors like surface texture, light reflection, and environmental exposure. Matte finishes reduce glare in brightly lit spaces, whereas glossy surfaces can create visual depth and sophistication. Thickness and mounting options should align with your original design specifications, ensuring seamless integration into the intended space.
Learn professional sign installation techniques to complement your precisely crafted signage.
To verify successful sign production, evaluate against these critical criteria:
- Does the printed sign match your original digital design precisely?
- Are colours accurate and consistent?
- Is the material appropriate for the intended environment?
- Does the sign maintain readability from expected viewing distances?
By approaching production with technical precision and creative vision, you transform design concepts into professional communication instruments.
The printing and production phase represents your final opportunity to refine and perfect your door sign, bridging creative conception with tangible execution.
Step 6: Install the Sign and Verify Placement
Installing your meticulously designed door sign represents the culmination of your creative journey, transforming a carefully crafted design into a functional communication tool. This final step demands precision, technical skill, and an understanding of spatial dynamics to ensure maximum visual impact and accessibility.
Placement accuracy becomes your primary focus. Begin by identifying the optimal installation location, typically adjacent to the door on the latch side, at a standardised height between 54 and 66 inches from the floor. This range ensures visibility for most individuals, including those using wheelchairs. Use a laser level or professional measuring tape to guarantee precise horizontal alignment. Professional installation requires selecting appropriate mounting hardware that matches your sign material and wall surface. Masonry walls demand different anchoring techniques compared to drywall or wooden surfaces. Consider using mounting brackets, standoffs, or adhesive systems that provide secure attachment without compromising the sign’s aesthetic integrity.
Before final installation, conduct a comprehensive placement verification. Create temporary positioning markers using painter’s tape, allowing you to step back and assess the sign’s visual impact from multiple viewing angles. Consider factors like lighting conditions, surrounding architectural elements, and potential obstructions. Some environments might require additional considerations such as glare reduction, accessibility for visually impaired individuals, or compliance with specific institutional signage regulations. Explore professional installation techniques to refine your approach and avoid common pitfalls.
To verify successful sign installation, evaluate against these critical criteria:
- Is the sign mounted at the correct height and location?
- Does the placement provide clear, unobstructed visibility?
- Are mounting hardware and techniques secure and aesthetically pleasing?
- Does the sign align with surrounding architectural elements?
By approaching installation with methodical precision, you transform your design from a conceptual piece into a functional, professional communication instrument.
According to Palomar College signage guidelines, precise placement and mounting techniques are crucial for creating effective and accessible door signage.
To help ensure you have thoroughly verified the effectiveness of each step in the door sign design process, the following checklist summarises the key completion criteria from each main stage described in the article.
| Step | Completion Criteria |
|---|---|
| Identify Audience & Purpose | Audience and sign purpose clearly defined; environment considered |
| Choose Materials & Tools | Materials suit the setting; durability; correct mounting hardware |
| Plan Design Layout & Content | Critical info stands out; text readable; uncluttered; context aligned |
| Create Design (Software/Handcraft) | Matches original concept; high readability and clarity; all info present |
| Print/Produce the Sign | Print matches design; colours accurate; material is appropriate |
| Install & Verify Placement | Correct height/location; unobstructed visibility; secure, neat hardware |
Transform Your Door Sign Design into a Professional Solution
Struggling to create door signs that actually communicate while looking professional? The biggest challenge most readers face is bringing clarity and polished impact together. The article has guided you through identifying your audience, choosing durable materials, and perfecting your layout, but taking your vision from concept to a stunning reality can feel overwhelming. Businesses often worry about installing signs that truly fit their environment or wondering if the final result will be as effective as planned.
Ready to make your signage truly stand out?
With PromoSigns, you can skip the uncertainty. Our team uses proven design strategies and premium materials to ensure every sign is both visually impressive and perfectly suited for your space. Bring your ideas to life with experts who understand the critical details, from layout to flawless installation. Discover how we can support your next project at PromoSigns. If you are especially interested in professional installation, see our detailed guide on how to install your shop front sign like a pro. Step up today and experience the difference that expert signage makes.
Frequently Asked Questions
How do I determine the best materials for my door signs?
Choosing the right materials for your door signs depends on the environment where they will be displayed. Indoor signs may use acrylic or aluminium for a sleek look, while outdoor signs require durable materials like weatherproof PVC or metal composites to withstand the elements.
What considerations should I keep in mind when planning the layout and content of my door sign?
When planning your door sign’s layout and content, prioritise the most critical information, maintain readability from a distance, use a clean layout to avoid overcrowding, and select colours that align with your intended emotional tone.
What software tools are recommended for designing door signs?
For designing door signs, professional vector graphics software like Adobe Illustrator or CorelDRAW is recommended, as these tools offer precise control over design elements and allow for clear, high-quality outputs.
What is the ideal height for mounting a door sign?
The ideal height for mounting a door sign is typically between 54 and 66 inches from the floor. This height ensures visibility for most individuals, including those using wheelchairs.
Recommended
- 7 Essential Indoor Sign Design Tips for Your Business – PromoSigns.co.uk
- Designing Effective Shop Signs: Essential Guide for Businesses – PromoSigns.co.uk
- Effective Signage for Architects: 2025 Guide for London Businesses – PromoSigns.co.uk
- How to Design Shop Signs: Expert Tips for 2025 – PromoSigns.co.uk
- Door Frame Reinforcement: Easy DIY Security Tips – My Locksmiths CA
- Garage Door Design Tips for Seattle Homeowners 2025 – Summit Garage Doors | Seattle’s #1 Garage Door Repair & Installation
